Creating dreambooth models can be a fun, yet challenging experience. In this guide we'll take a look at how we can create a dreambooth model using the Stable Diffusion webUI Automatic1111.
This guide assumes you already have access to a Automatic1111 installation.
Installing the Dreambooth tab extension
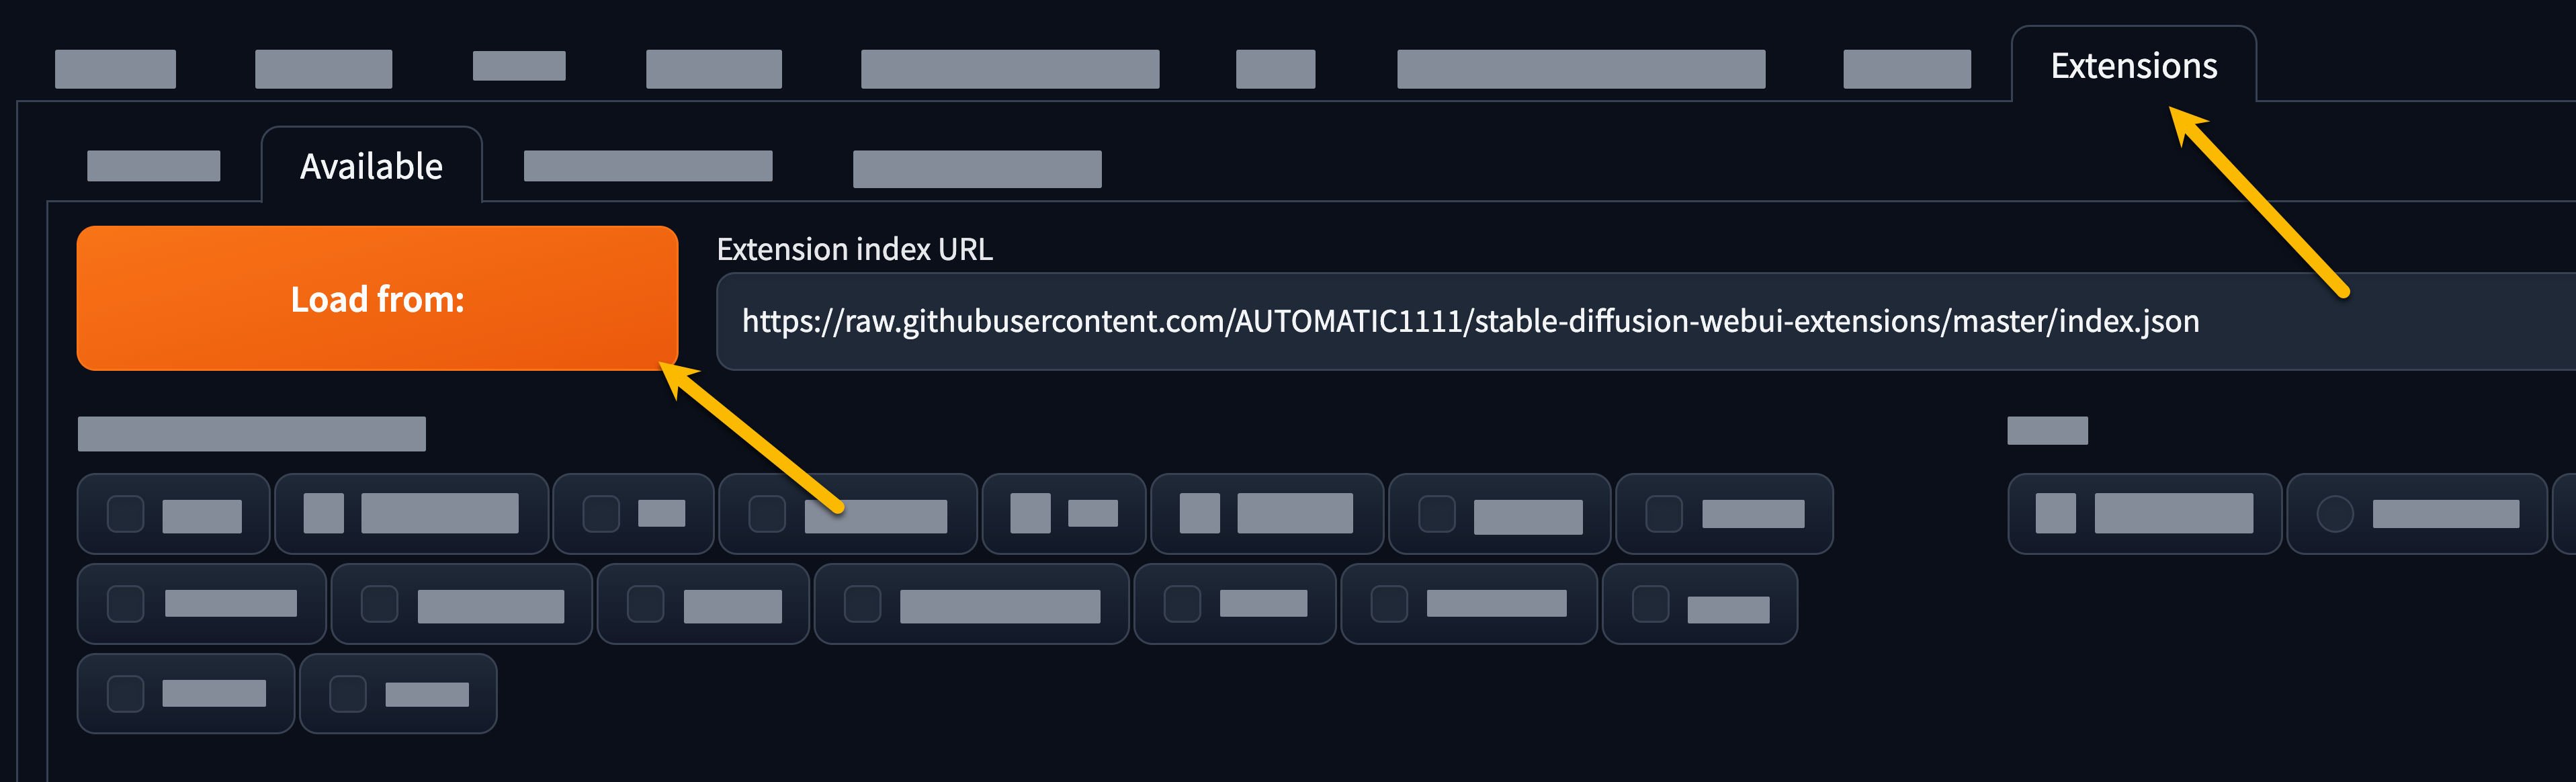
In your Automatic1111 interface, navigate to 'extensions' and click on 'available'. Afterwards, press the orange 'load from' button with the following URL: https://raw.githubusercontent.com/AUTOMATIC1111/stable-diffusion-webui-extensions/master/index.json This will load all the available extensions for Automatic1111.
Navigate to extensions - available In the list of available extensions, look for 'Dreambooth' and click on 'Install' Install dreambooth extension After installation, it's very important to completely restart the Automatic1111 interface, reloading will not be sufficient!
Preparing a model for Dreambooth training
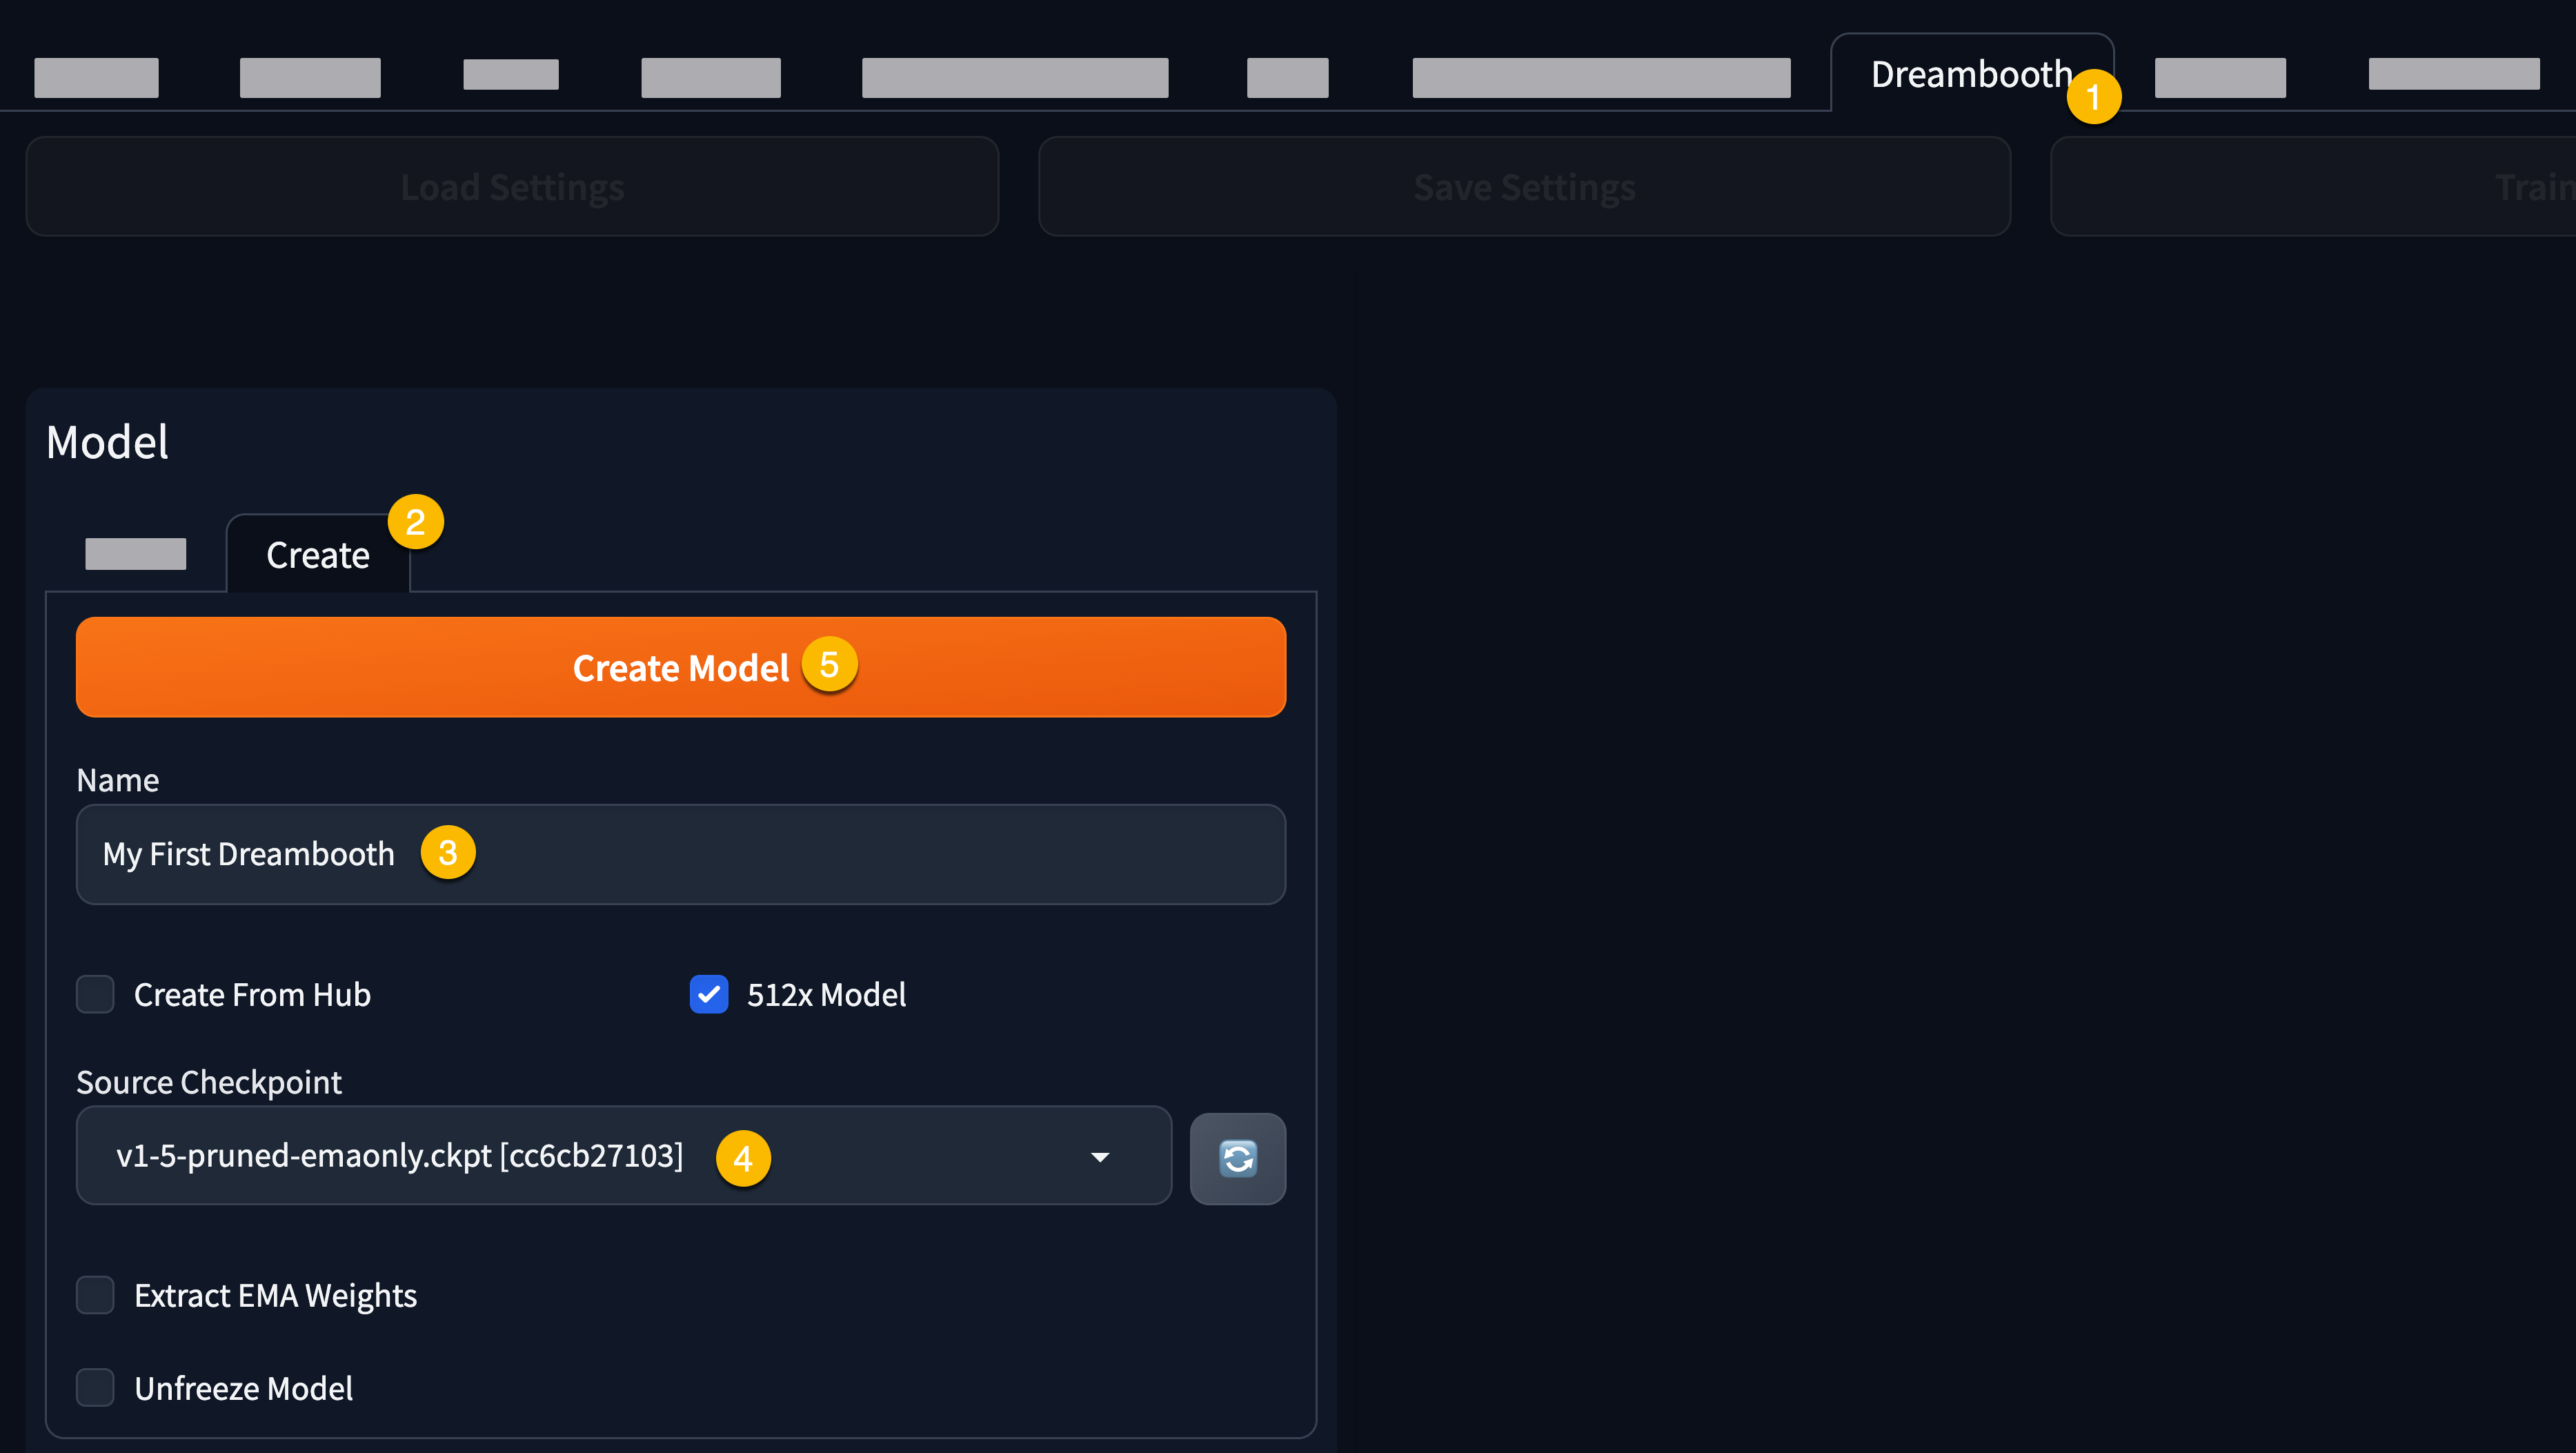
When you open up the Automatic1111 interface, you'll see the new 'Dreambooth' tab appear at the top (1). The first thing we'll need to do is create a new model to train on. To do this, click on 'create' (2) and fill out a name (3). In the 'source checkpoint' (4) you can choose a base for your Dreambooth training - in many cases you'll want to stick with v1-5-pruned-emaonly.ckpt, but you can experiment with other models as well (eg. Analog Diffusion).
Preparing a Dreambooth training Finally, press 'Create Model' (5) and after a few minutes, your new model will be ready to be configured for training.
Preparing a dataset
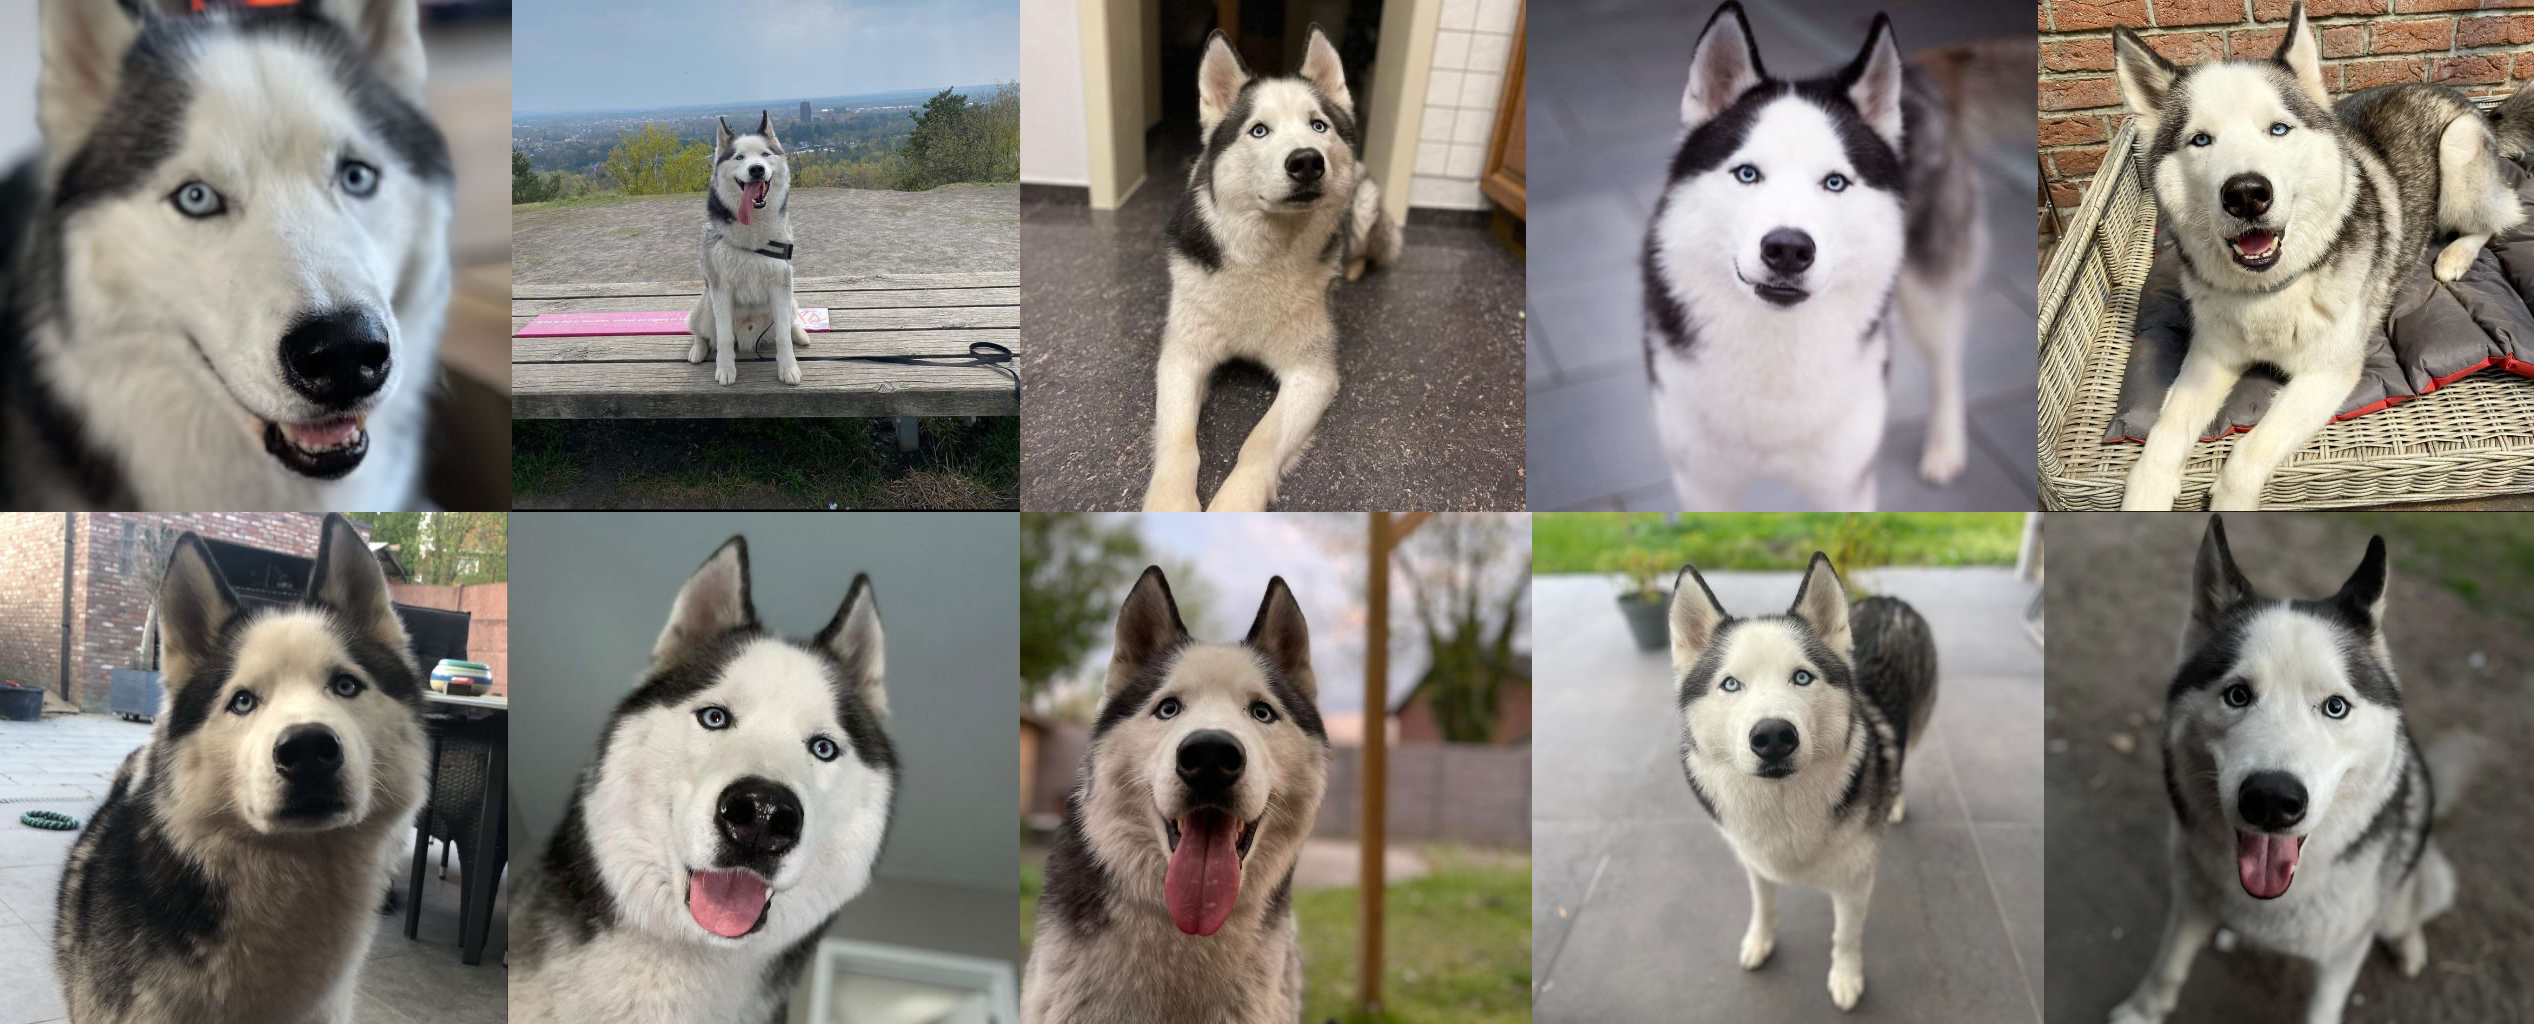
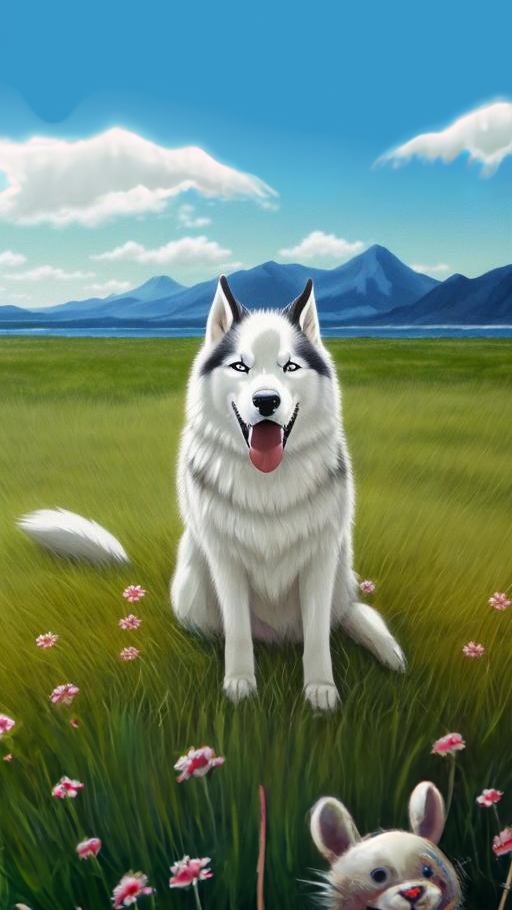
Using Dreambooth, it's possible to inject a person, animal, object or style into a Stable Diffusion model. Before we can start the training process, we want to prepare a dataset. We need at least 10 images, the more variation, the better! After you've collected your photos, you need to resize the images to 512x512. A tool like BIRME can help you with that. Save the resized photos in a folder you can remember on your hard drive (Eg. C:\dreambooth) Example dataset of a dog
Configuring and training a model
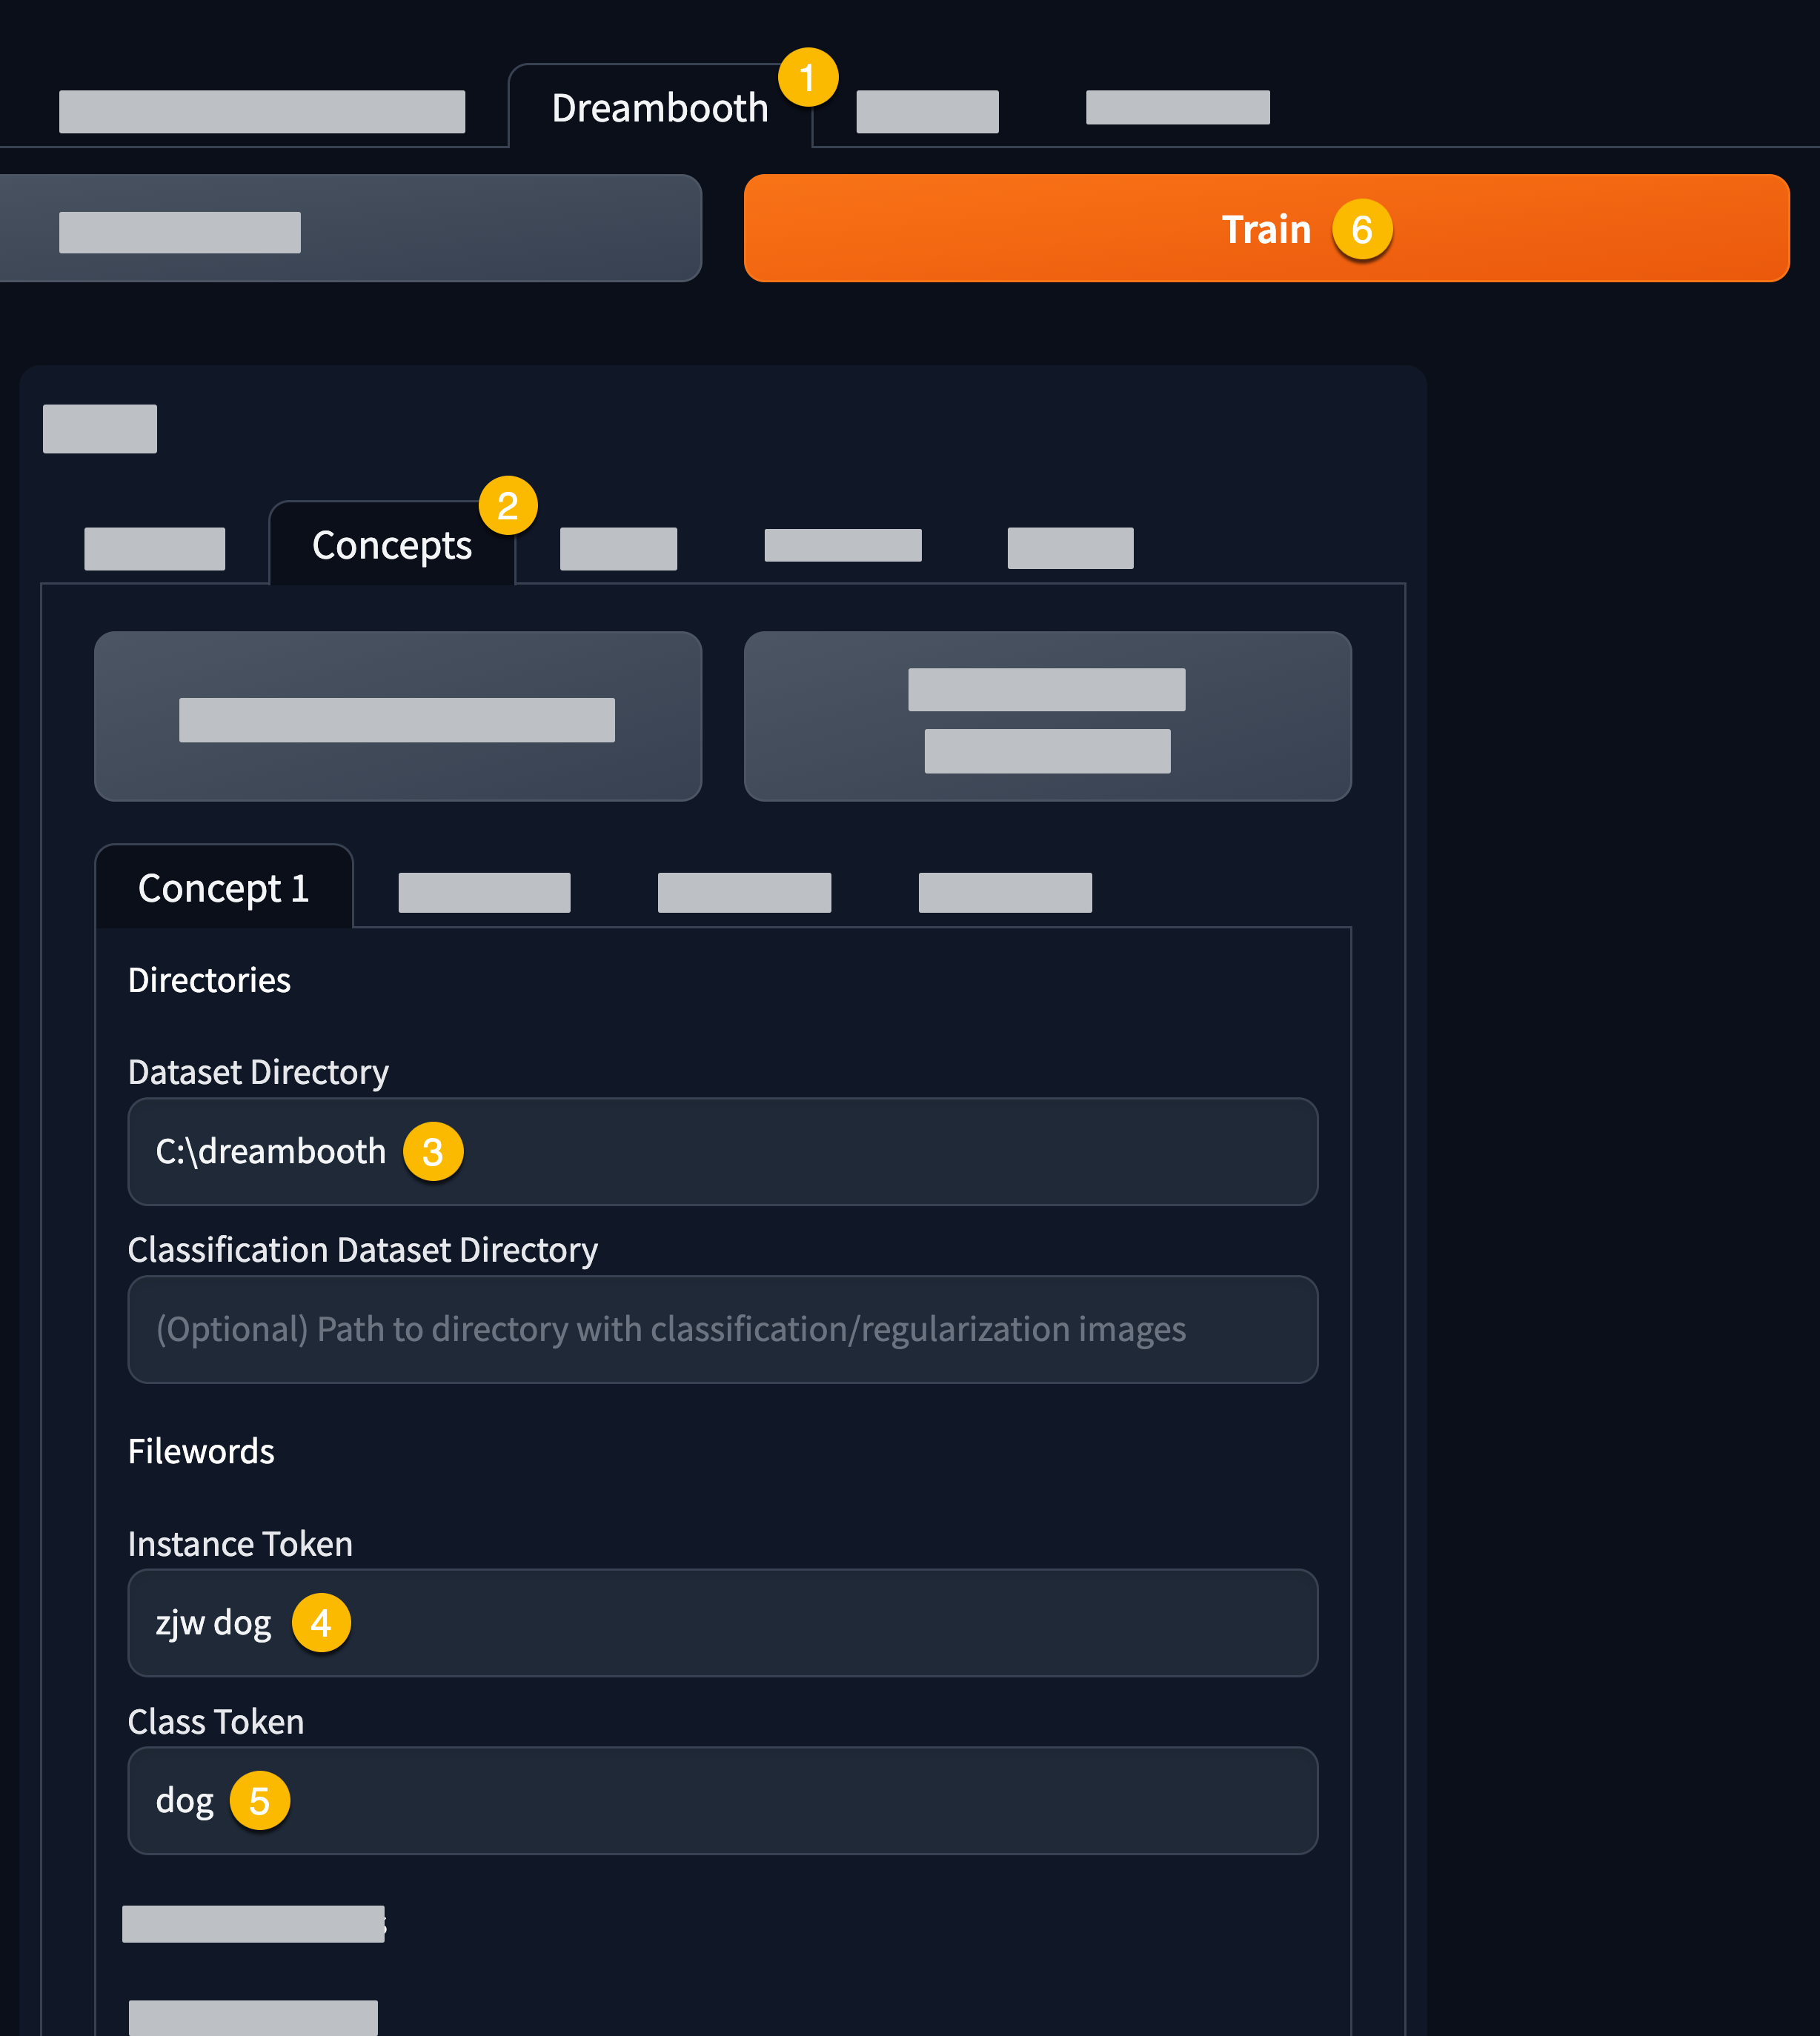
Next up, we'll configure the concept we want to train our model on. Lucky for us, Automatic1111 uses some pretty good defaults, so our work is almost done. Back in the Automatic1111 interface under the Dreambooth (1) tab, click on 'Concepts' (2) and fill out the following fields:
Dataset directory (3): location on your harddrive with the photos of your subject
Instance token (4): when prompting you'll want to use this, for a dog you can use zjw dog for example (zjw can be any token you want, in the early days sks was often used), for a person you can use zjw person, zjw man or zjw woman
Class token (5): a description of your subject (eg. dog, man, woman)
Configuring a concept Finally, press train (6) and the Dreambooth training process will start. This can take anywhere from 10-60 minutes, depending on the processing power available.
Let's get prompting
After a successful training, you can select the model in the model selector: Select your new model And you can start prompting your subject, in this example we need to include zjw dog in the prompt, for example: Illustration of a zjw dog in a field, studio ghibli style, cartoon And that's it! Dreambooth training using Automatic1111 can be a fun, yet challenging and technical process. If you're looking for a simpler way to train your own model, StudioDeepfake.com has you covered!